
As I teach in different kindergartens, I realized that children attending one that practices Montessori are more independent compared to children attending a kindergarten focused on academics. Because of this, I decided to start Montessori at home.
So how to make your home Montessori? Start teaching your toddler how to do things by himself, like taking his own spoon and bowl, his clothes, and diapers. Put his things low so he can reach and take them. Build him a Montessori bedroom and play area and childproof your house.
I’m going to go into details on how to do those things, how I did it for my 18-month-old son at home, giving you the step by steps to start Montessori at home. It’s not only about building the place, but also how to put it into practice, and we will cover both. We will focus on building the place first.
1. Start with building a Montessori bedroom
The best place to start is with the bedroom. The bedroom shouldn’t be cluttered, it should have as few things as possible. Everything needs to have a purpose so you need to choose carefully what needs to be in there. My son’s bedroom only has this.
- 2 mattress combined (or you can use a floor bed)
- 1 small wardrobe, with some organizers
- 1 Teepee (his play area)
- 1 Tray for keeping toys
- 1 laundry basket
1A) How to build a Montessori bed?
I bought 2 mattresses from IKEA called KRUMMELUR, combined them and placed them on the floor. You can also use a floor bed, I just found it more affordable if I just buy the mattress.
Either way, the bed should be very near the floor so that your toddler can get out on his own. If you put him inside a crib or playpen to sleep, then he losses the freedom to roam around which is important in Montessori.
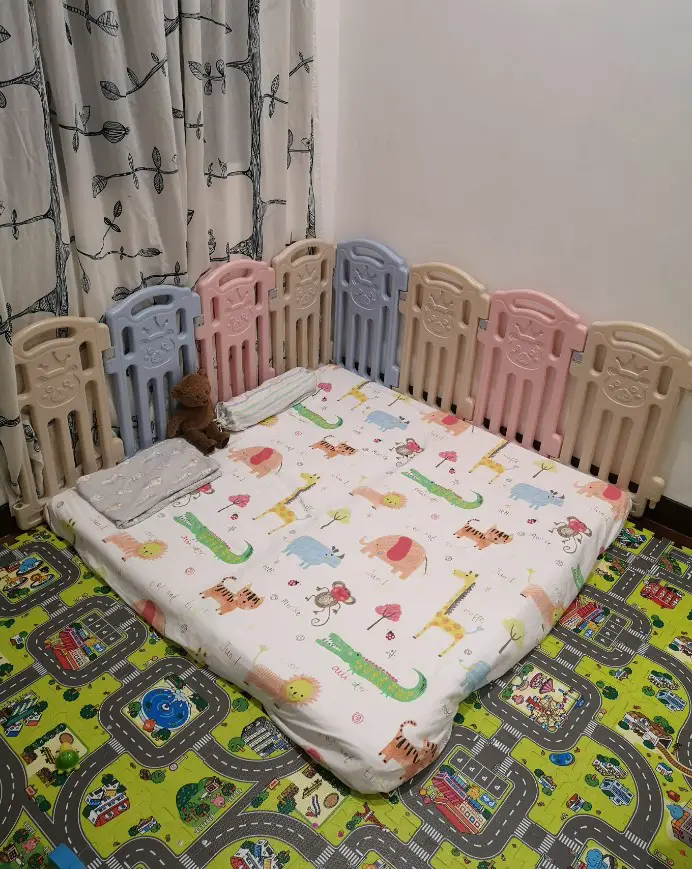
There are only a pillow, a soft toy, and a small blanket, and that is enough. Ideally, you don’t even want the soft toy and blanket there for safety reasons, as they are known to cause suffocation. My 18-year-old is already used to it so I left it there.
When my boy was younger, he used to roll out of his bed, so I placed those playmats around him to act as a cushion when he rolls out. The fence is to prevent him from knocking the wall, he really does roll a lot in his sleep!
Make sure the mattress doesn’t move around too much. Gaps created in the middle or at the sides can cause your baby to fall in. If that happens and they cannot turn around, it can hinder them from breathing. This can happen even if you’re using a bed so just take note.
1B) How to build a Montessori wardrobe?
The wardrobe must be short enough for your toddler to take his clothes himself. It was difficult to find a wardrobe that meets this criterion, so I decided to make the wardrobe myself. Here’s how it looks like.
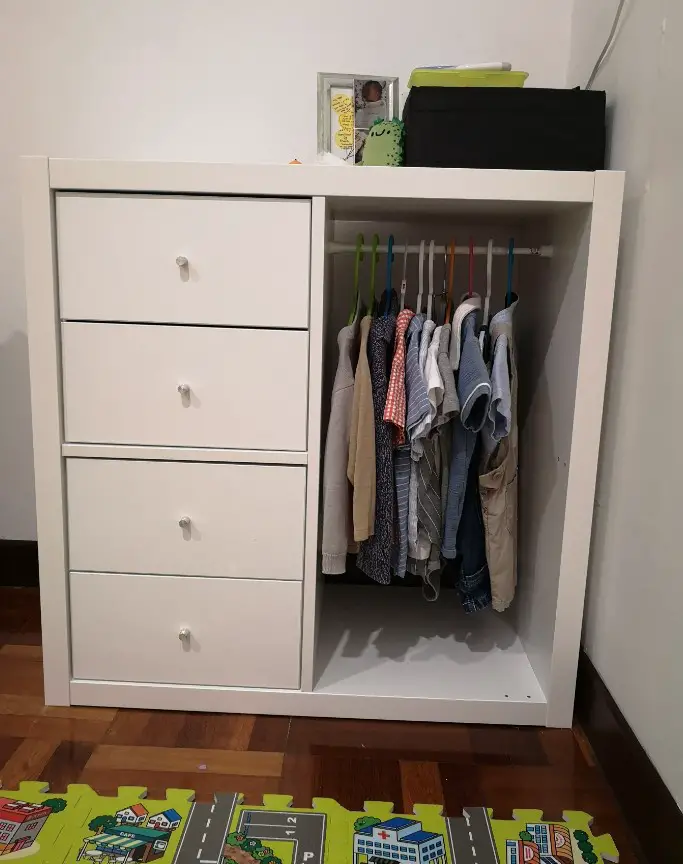
You won’t find this wardrobe in IKEA, it’s custom made, but it’s easy to build it yourself. You only need to purchase 4 parts and you can get them from IKEA and Daiso. Here are the materials you need to build that wardrobe.
| Parts Name | Measurement | Quantity |
|---|---|---|
| KALLAX Shelf Unit (4-cubes) | 77 x 77 CM (30 3/8 x 30 3/8 inches) | 1 |
| KALLAX Insert with 2 drawers (1 purchase comes with 2 drawers, you need 4 drawers in total) | 33 x 33 CM (13 x 13 inches) | 2 |
| Daiso Adjustable Tension Rods (Or any other tension rods within this measurement) | 30 x 45 CM (11.8 to 17.7 inches) | 1 |
Credits go to Hapa Family, I bumped into their video when I was looking for a Montessori wardrobe. I followed his video until 1:15 and then I stopped because it became too complicated for me after that.
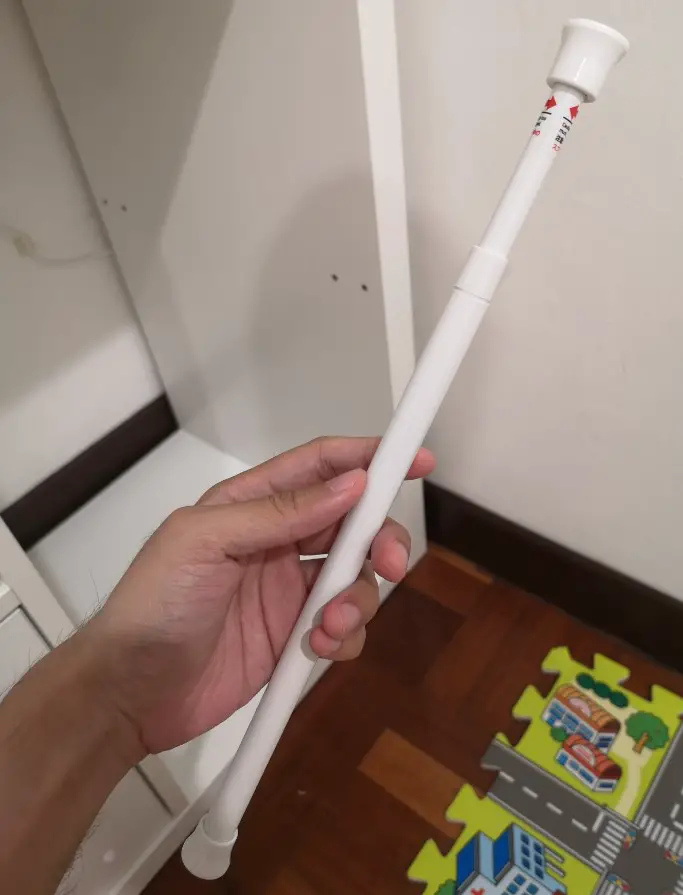
By 1:15 everything would have been done except placing the hanger rods. If you have the equipment and skill to follow the video, don’t let me stop you. But I went to Daiso and bought a tension rod, then used a minute to install it and I was done. I suggest you do the same if you want it easier.
Here’s how the rod looks like. It’s so easy to install and it fastens on it very well. My son has never pulled it down, it’s firm. Make sure you buy according to the length I provided in the table above or it may not fit.
1C) How to build a Montessori reading corner inside the bedroom?
Having a reading corner is important. There is a place to sleep, a place to put his clothes, and a place read. Designate a reading corner and be creative about it. I placed a Teepee in the corner of his room for him to read.
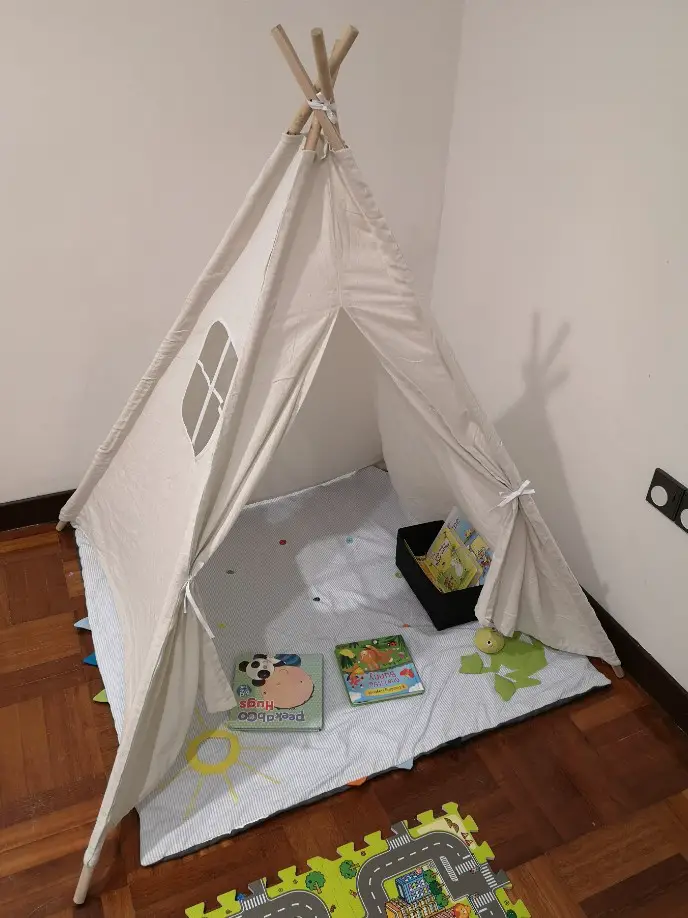
As he wakes up, and before I get to him, he can go to his reading corner to read the books. A problem with something sheltered like the teepee is that it blocks light.
Reading won’t be a problem during the daytime but at night it’s not good for his eyes even if you have the lights on, as the teepee blocks the light. On the bright side, we can train him on how to only read in the light. Children are really smart, teach them and they will learn. Having a light source that he can switch on by himself is recommended.
1D) Getting a trolley to organize toys
The reason why I have toys in his room is that I want him to be able to explore, roam around his room and keep himself occupied when he wakes up. In Montessori, maintaining order is important. Everything should have its place, you need a place to keep all his toys and I choose a trolley.
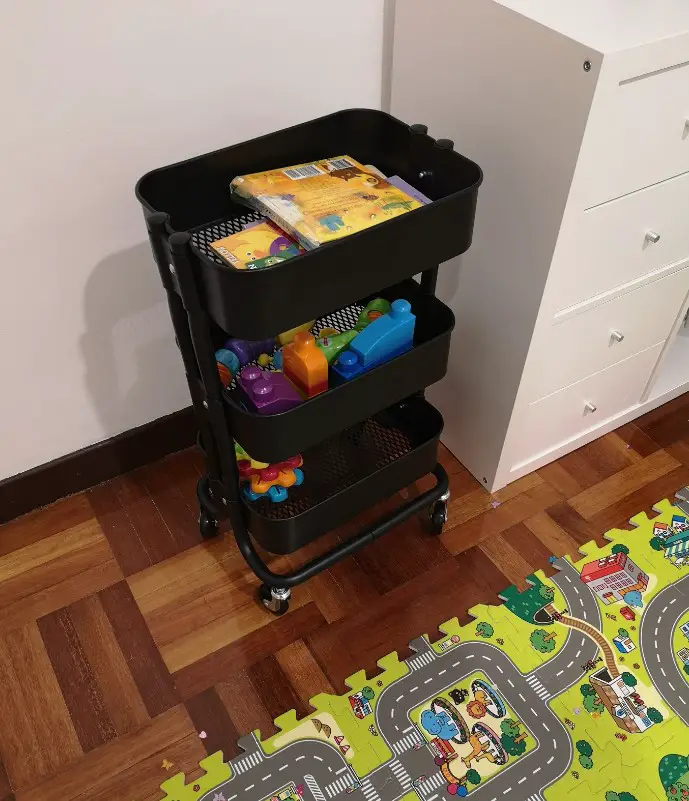
This is also a fantastic trolley you can find in IKEA called RÅSHULT. It’s easy to roll around, the size is just right and it has enough levels to organize the toys. You can use other things to organize the toys like boxes, just make sure there’s a proper place to store the toys.
Having toys in the room doesn’t mean the room can become a play area. The room should only be meant for resting and sleeping. But having a few toys and books in the room can be a good idea, it can be comforting to him if he can play a little bit before he sleeps or after he wakes up.
Just make sure that you do not create play activities in the bedroom, or play with him inside. At least try to minimize it. We will cover the play area later.
1E) Preparing a laundry basket
This is the final thing I placed in his room, but it is important! After changing in his room, where do the dirty clothes go? Teach him to place it in the laundry basket rather than taking it away for him.
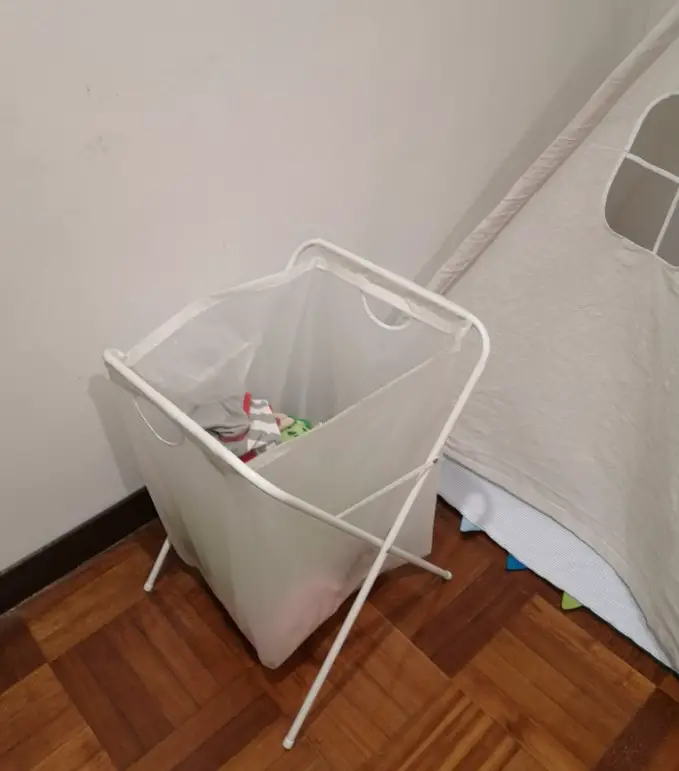
I think you guessed it by now. The laundry basket I get is also from IKEA called JÄLL. I like IKEA furniture, most of their furniture are children friendly, and the height is short enough for toddlers to reach.
2. Follow Up With Building a Montessori living room
The living room will most likely be the place your toddler spends most of his waking time, so we should put effort into building him a Montessori living room and here’s how we’re going to do it.
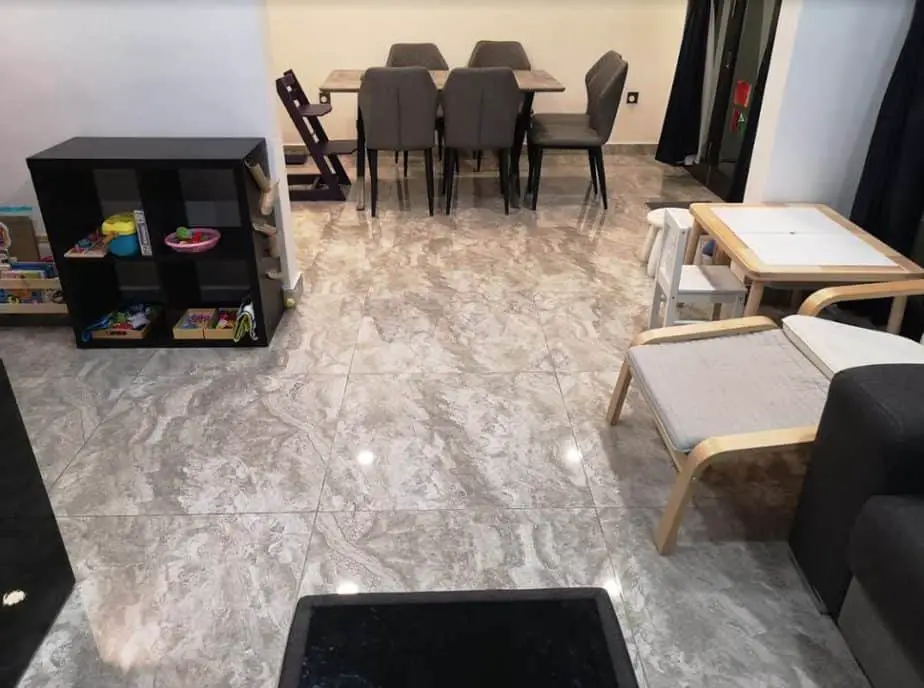
2A) How to build a Montessori toy shelf
We need a place that is short enough for the toys to be reachable, preferably one without doors or covers so that the toys remain visible and accessible to him. Finding one with different compartments is also important so that the toys can be organized properly.
My choice is the IKEA KALLAX Shelf Unit (4-cubes), it’s the same one I used to build the wardrobe, just with a different color. It’s good to mix the color up a little so everything doesn’t look the same. I place the bookshelf beside it too just to save space, also from IKEA called FLISAT Book Display.
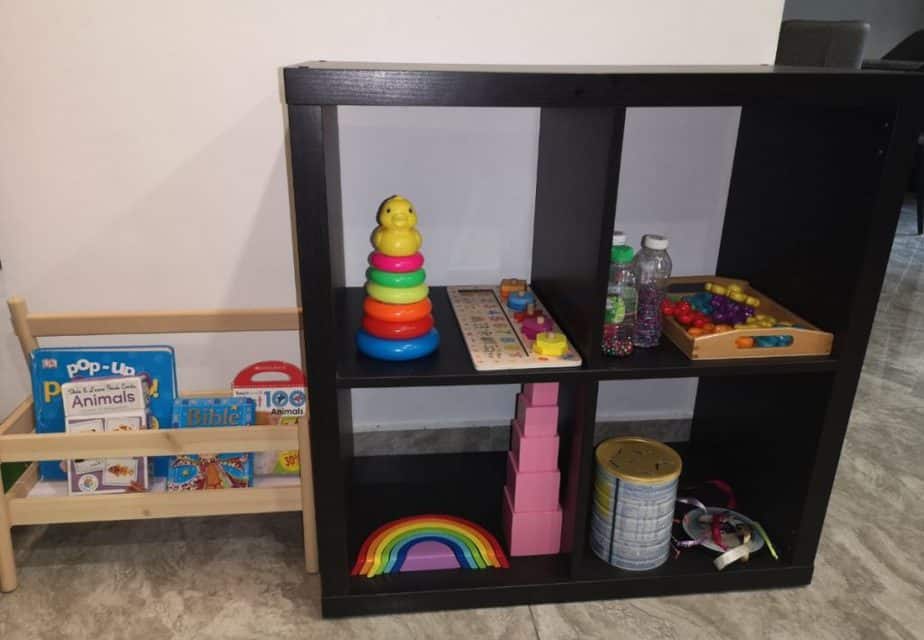
Don’t put too many types of toys on the shelf. You can put as little as five, but my choice is between eight to ten. You also shouldn’t put things other than toys here. The milk powder tin is a toy I made for him, I’ll cover more on Montessori toys in the next article.
The toy shelf also shouldn’t be cluttered, the space for Nathan’s toy shelf only allows 2 types of toys per cube. If the shelf is deep, make sure the toys are not placed deep inside for two reasons:
- It makes it hard to reach
- He may mess up the toys in front in order to reach the ones at the back
You should rotate the toys in and out. Continue to keep the toys that he often use on the shelf and take out those that he don’t use. You can do this rotation on a weekly basis. Don’t take away the toy he often uses as he is still learning and trying to master it. Sometimes a toy will only be of interest at a later date, so don’t throw them away if your child doesn’t show interest in it now.
2B) Preparing a Montessori table and chair
Tables and chairs are important for adults, it is a place to do our work among many other things. Likewise in Montessori, it is important to teach our children how to use furniture too, starting with the table and the chair.
This table and chair need to be child-size, low enough for him to climb and sit on the chair by himself, and comfortable enough that he can use it for as long as he requires.
You can place the table and chair near the play area, however, because of space constraints, I place it a little bit further away but still within the living room. Here’s how it looks like.
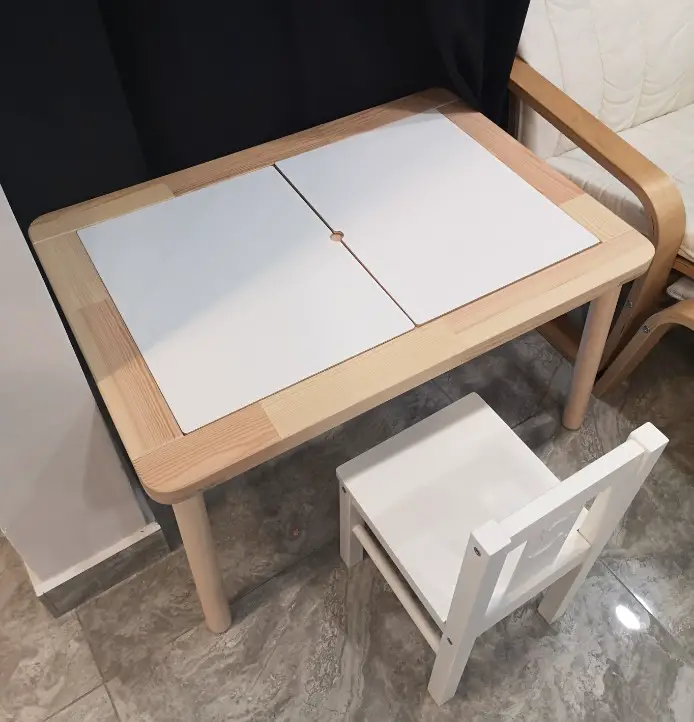
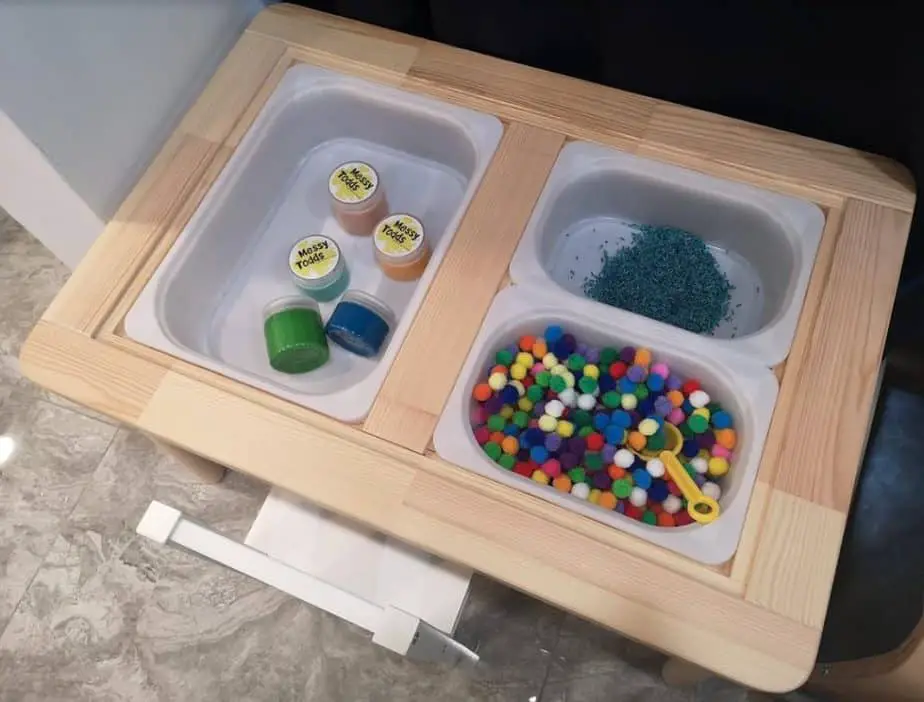
When closed, the table can act as a drawing table. He can also use it as his meal table. When it’s open, it acts as a great place for messy play (or sensory play) as it can contain most of the mess inside the table. The materials can be placed in the storage boxes beneath the table to save space.
The table is from IKEA called FLISAT. It does not come with the storage boxes that are accessible once the table cover is removed, you need to get them separately.
The storage boxes are called TROFAST, there are many sizes to choose from. If you’re following mine, then the left side is one unit of 16½ x 11¾ x 4 inches (42 x 30 x 10 CM), the right side is two units of 7¾ x 11¾ x 4 inches (20 x 30 x 10 CM). Feel free to mix and match to make your own table, just make sure it fits.
The chair is called KRITTER. The height is just nice for my 18-month-old to climb up and sit by himself and light enough for him to push it to another place if he so desires. We will cover in more details on how to use this area, for now, let’s continue to build the other areas first.
2C) How to create a Montessori play area
A designated play area is important. Remember that in Montessori, everything has a place and order is important, so you must have a play area for your toddler to play or use his materials.
The best play area is the area beside the toy shelf so that your child can take his toy and immediately start playing. Changing the toys is also easier for him that way. I made his play area between the toy shelf and his table.
Ultimately, the goal is to promote independent play, so you must childproof the play area and make it as safe as you can. My son’s play area is in front of the television and there are wirings around, that is why I have a fence making these electronic devices out of his reach.
Watch out for other non-obvious things that may harm him as well. In my case, since the television is inside his play area, it is always switched off whenever he is using the play area. Watching television at such a close distance is bad for his eyesight. Other examples are:
- If it’s near a window, make sure he can’t reach it.
- If there are electrical sockets, make sure it is covered.
- If it is near a cabinet, make sure it is fastened to a wall so if he climbs it, it won’t fall on him.
- If he pushes any furniture, nothing above will drop from above and fall on him.
Don’t worry, I have another article covering how to childproof your entire house, and how proper childproofing can aid in Montessori. You can access it here but for now, let’s move on to the next area, I’ll give the link again later.
3. Build a Montessori dining area for mealtime
We have covered the bedroom and living room, now let’s move on to the dining area. Having a Montessori dining area is important if you want to practice Montessori at home. Your toddler will need to eat every day so we must have a proper place for them to do so.
3A) How to designate a place to store bowls & utensils
Find a cabinet suitable for his height to store his bowls, plates, and utensils. We need it accessible so that he can open it, take what he requires, close it and carry it to the table by himself.
Depending on how many bowls, plates, cups, utensils, or other things you provide to him, you will need as many sections in the drawer. Every dining utensil needs its own place.
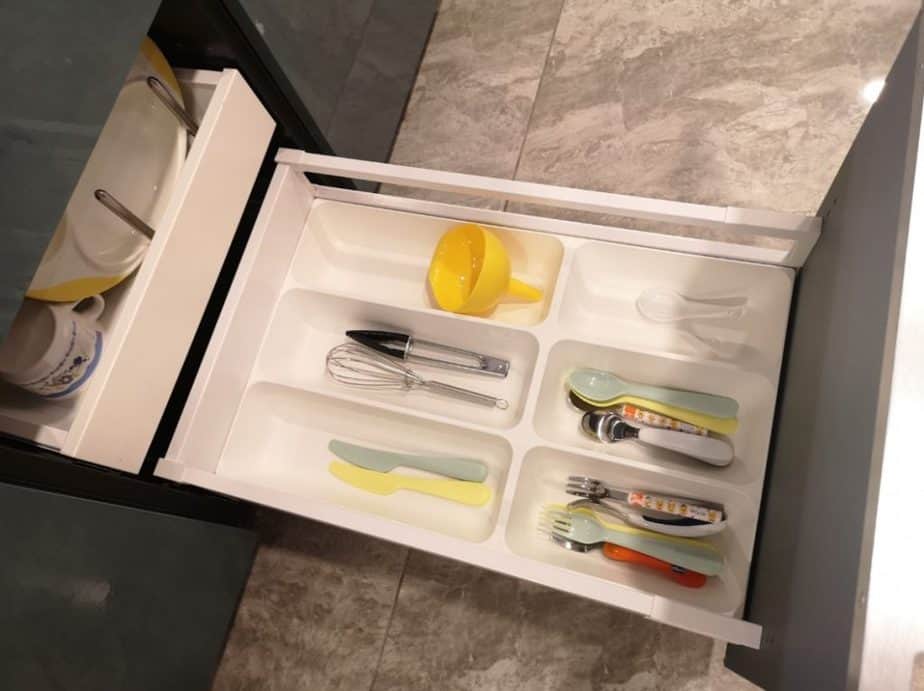
Here is how our cabinet looks like, it’s where we store our plates, bowls, cups, and other utensils. Since Montessori emphasizes on giving a real experience, I made space in a real cabinet for Nathan. His cabinet is at the lowest row, and third from the left, and when it’s mealtime, he will open it to get his things.
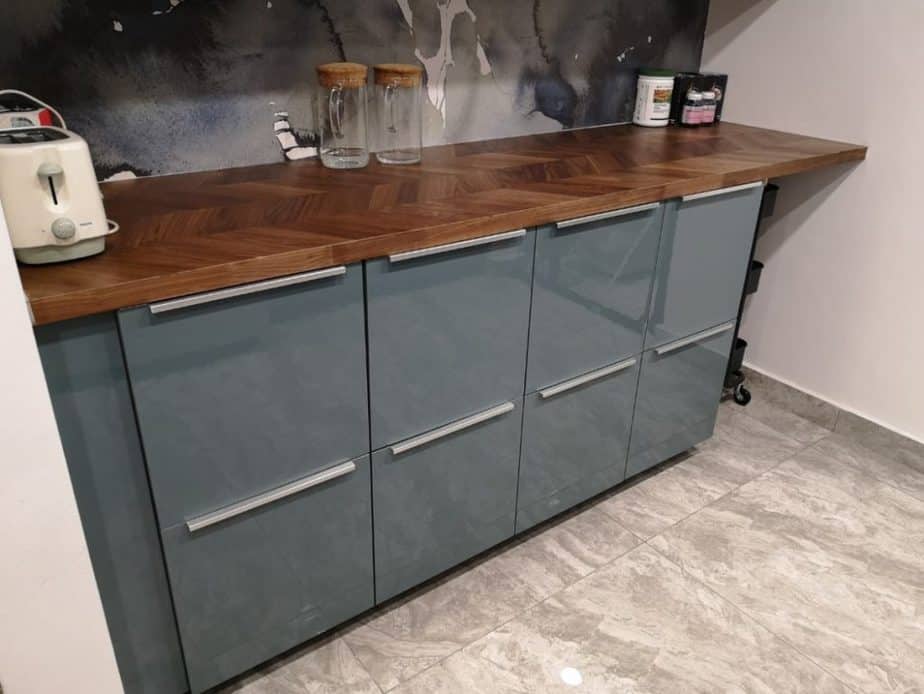
Once opened, he can access his fork, spoon, and knife. I placed some other kitchen tools there as well for him to use in the future, he just ignores it for now. To get his plate, bowl, and cup, he will pull the inner drawer to get it. You can have multiple plates for example, and he gets a choice to choose which one he wants to use for the meal.
Montessori teaches us to use real things, to give children china plates (porcelain) and glass drinking-vessels so that they can correct themselves when they knock against, overturn, and break things. Hence, consider using those if you want to follow closely with Montessori.
UPDATE: At 19-month-old, I switched his cup to a small glass, let him use porcelain plates and bowls, as well as metal fork and spoon.
3B) Getting a Montessori high chair is key
I want my son to sit at the table and have family meals together, and not eating in front of the TV, so finding a way to let him take a seat at the table by himself is important.
I was initially using IKEA ANTILOP, but that high chair is not compatible with Montessori since I have to carry him onto it, and also putting him down after meals. We need to find a chair where he can climb up and down by himself as Montessori emphasizes independence.
IKEA has an independent high chair called LANGUR, it serves the purpose as your toddler can climb up and down himself. But what I don’t like about it is that it is not adjustable. If it doesn’t fit your child’s height or matches your dining table’s height, It’s going to be uncomfortable for your toddler.
The best one I’ve tried so far is the Tripp Trapp from Stokke. The height is adjustable, and there are 2 planks. The bottom one is the stepping platform and the top one is the seat, both are adjustable according to the height of your toddler.
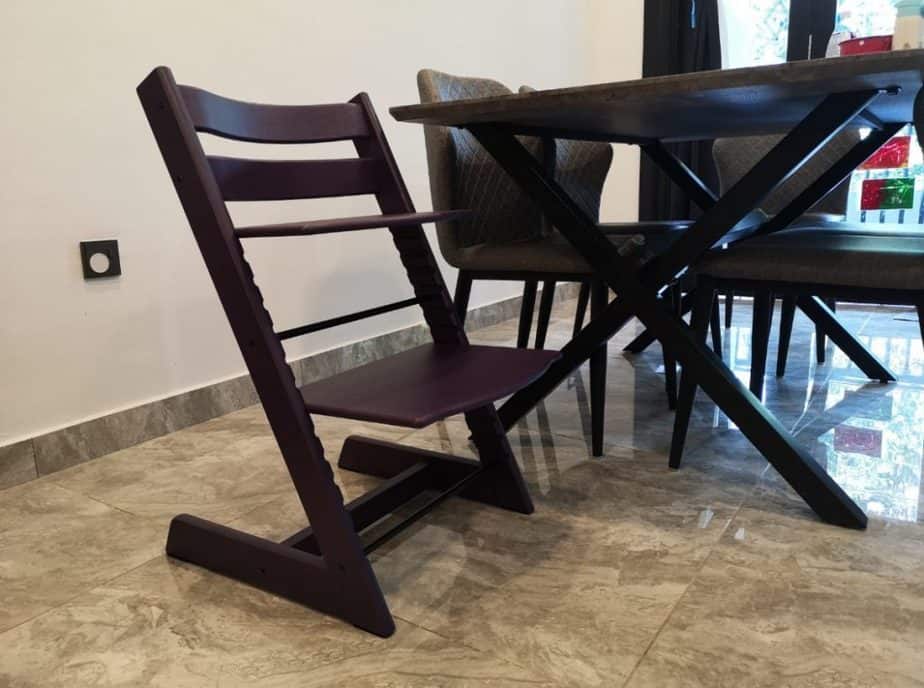
My 18-month-old toddler has no problems getting up and down the chair, and he is super excited with his new chair. The material is great, the paint job is excellent, and doesn’t have odd crevices that trap food, and cleaning it is easy, just use a damp cloth and you’re good.
4. How to get the kitchen ready for Montessori work
The kitchen is another place to have Montessori activities with your toddler. This can be a place where he can wash his own dishes after a meal or do some activities like baking. I only make the dry kitchen available to him, my wet kitchen is too small to accommodate him now.
4A) How to make the tap and sink accessible for washing dishes
Normally, your tap and sink will be too high for your toddler to reach, and what you need is just a platform for him to climb up. I started by using IKEA’s BEKVÄM step stool, it’s not perfect but it works OK.
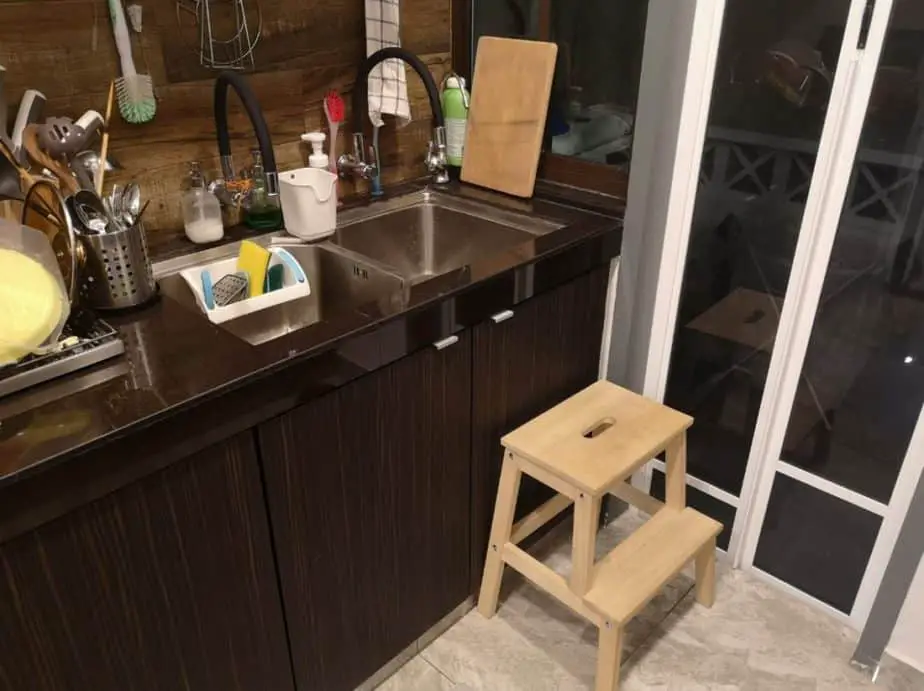
The problem with the BEKVÄM is that it has no grip at the bottom, so it can slide out as he leans against the countertop. Get some non-slip furniture pads and stick them at the bottom to give it grip.
The other problem is that it cannot catch your toddler if he losses his balance, falls backward or sideways. Be ever ready to catch your toddler if you use it. That said, my son started to use this at 17 months and we had no problems, he climbs up and down of it and stands on it to wash his dishes just fine.
There are many stools in the market today for this purpose, search for kitchen helper in Amazon and you can get a list of them. You want to get one that your toddler can climb into and out of it by himself, and can also catch your toddler if he falls backward. Here is an example of one. Problem? They can cost anywhere from $80 to $200!
There are some DIY videos around where you can follow to modify the BEKVÄM to become a safer kitchen helper, and it may just cost you anywhere between $10 to $30 to get the materials. Let me tell you though, it is not easy to build and I failed twice and gave up since I don’t have the proper machinery to follow the videos.
Find something that he can climb up by himself, and that he can reach the water. It’s fine if he can’t reach the tap, you can switch it on for him. He may be unable to properly rinse the plate, that’s also fine as you can apply the soap, let him rinse it, then take it back and give it a thorough rinse.
The important thing is he starts to learn how to do it, and toddlers love to help out in chores. Let your toddler do it, it will likely make your job harder, but it’s good for his development and remember, Montessori teaches independence, this is a great way to make him independent.
5. Last but not least, how to make a Montessori bathroom?
The bathroom is another place to practice Montessori. There are three things to do here.
- Brush his own teeth
- Bathe by himself
- Use the toilet himself
Depending on his age, you may not be able to start number 3 yet, but you can still get things ready in advance.
5A) Getting a stool to help him to the sink
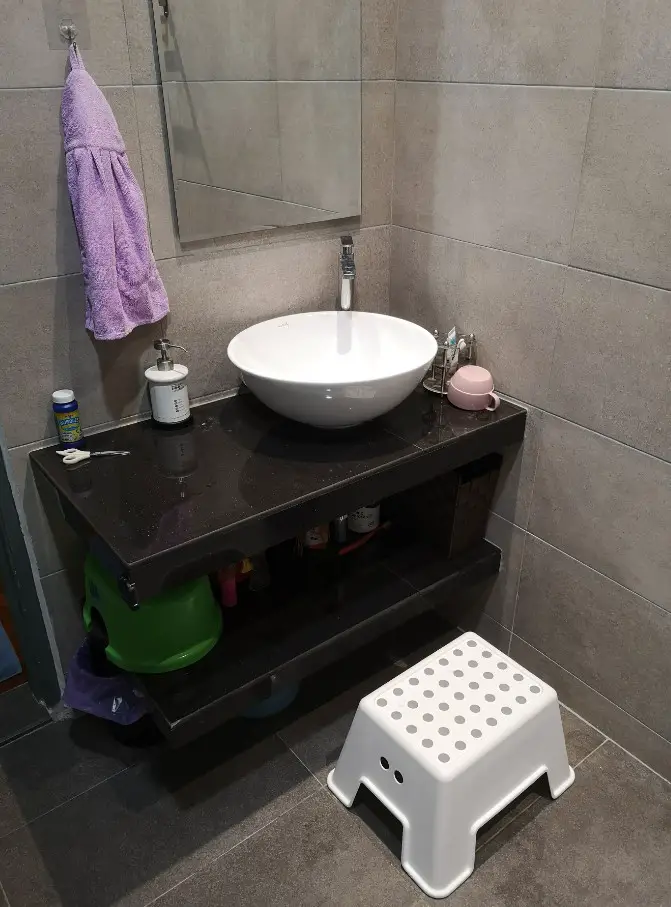
As long as your toddler can hold the toothbrush, you can start teaching him how to brush his own teeth. First, you need to prepare a stool high enough for him to reach the sink. Avoid wooden stools if you can as the bathroom is going to be wet often. A plastic stool is a good choice.
You also need to place the toothbrush and the cup nearby. Don’t worry too much about whether he knows how to brush his teeth or not, that can be taught over time which I will cover later. Start with teaching him how to take the stool out by himself, climb up to it, take the toothbrush, toothpaste, and pass it to you.
5B) How to prepare the bathing area
If your bathroom is like mine where the shower is too tall for your toddler to reach, then you can either prepare a bucket of water or use a bathtub. Either will be fine, but a bathtub will be easier as your toddler can sit inside it to bathe, whereas for a bucket he will need to learn how to scoop the water and pour it on himself.
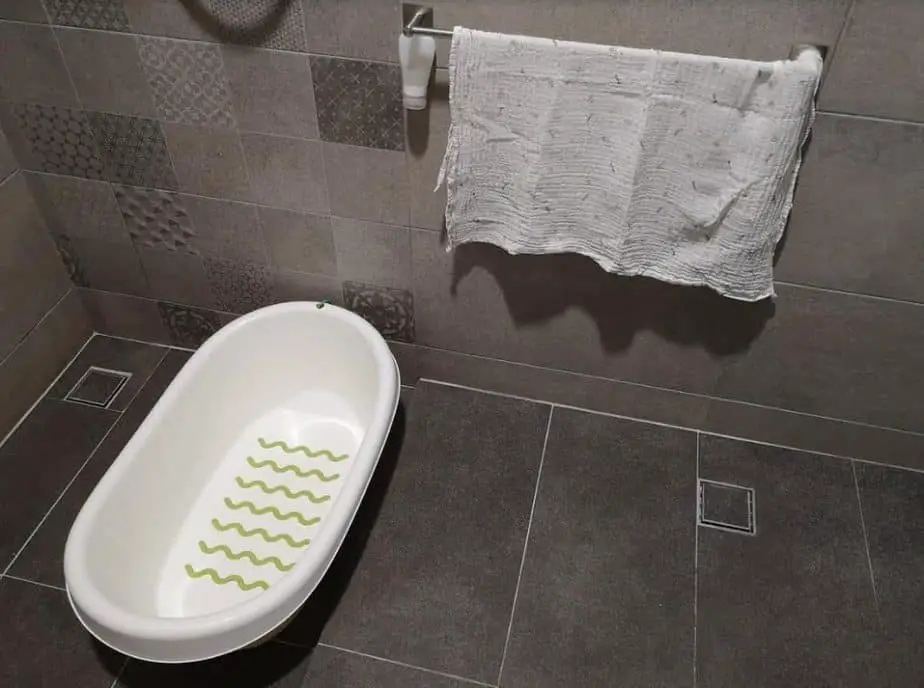
Next, keep his towels and soap within his reach. Install a towel rail rack low, and use shorter towels because long ones will probably touch the floor. Your toddler will pull the towel, and will most probably cause the towel to hit the floor so make sure that area is dry and clean.
Install a shampoo bottle holder low too, something he can press to get the soap. Suction cups degrade overtime so getting one with a really good sticker or those that require drilling may be a good idea. Mine is placed right beside the towel.
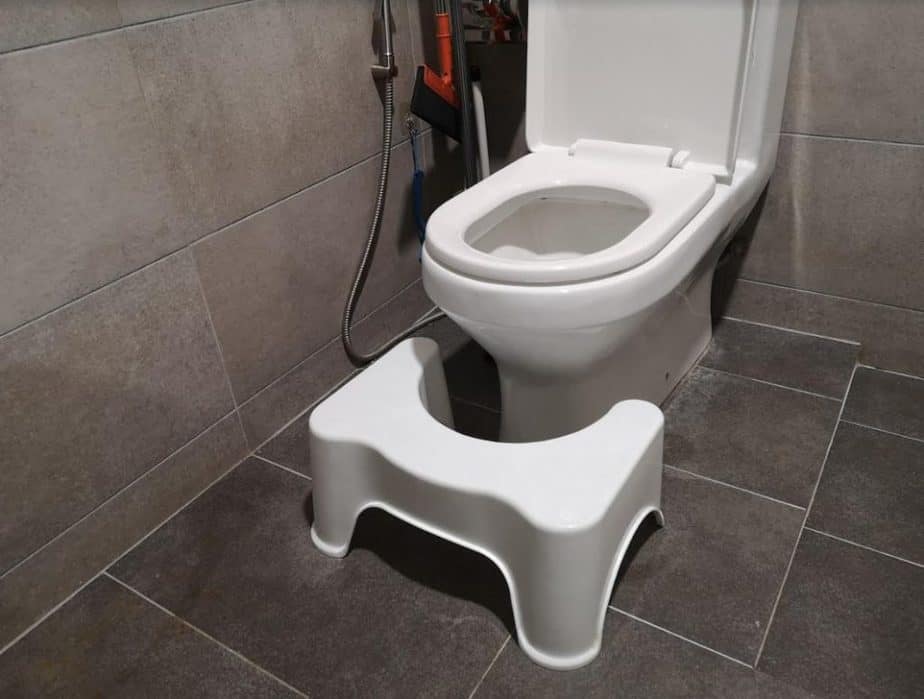
5C) How to prepare the potty area
You can purchase any potty as long as the size is suitable, the important thing is where to place the potty. Don’t let him use the potty in his room, or anywhere else that you wouldn’t want him to pee or poo when he grows up. Place the potty inside the toilet and let him use it there, let him get used to doing his business inside the toilet.
I bought a potty but I think I only used it once or twice. I started to teach my son to sit on an adult’s toilet since young. He is not potty trained yet, he still does it in his diaper, but I will put him on the toilet seat and wash him while he sits there and we have been doing that since he was 10 months old.
Get a stool, something like the picture below, then he can get up and down the toilet bowl himself. He may need more help to go up and sit on it, so be ever ready to support him so he doesn’t fall in, but coming down is easy as the stool gives him the needed assist.
I hope you feel excited that your toddler can use an adult’s toilet at such a tender age. Yes! Children can accomplish amazing feats when given the confidence to do it. We will cover how to use the toilet in the next article.
After building the place, what are the next steps?
The next thing to do is to childproof your home so your toddler can freely explore the house safely. This article is already too long so I need to cover it in another article. Click here to head over there to check it out. As I said earlier, there’s a method to childproof that can promote Montessori practices, so check out that post.
It may take you time to do everything mentioned in this article, and you don’t have to do it all at one go, just start with any of the five areas we talked about. I recommend following it in order though, as your child will spend most of his time in his bedroom or living room.
Building a Montessori house is the first step, how we utilize everything we built to incorporate Montessori’s teachings and techniques are the second step. I will share with you how I applied Montessori at home in the 5 areas we talked about in another article.
I will also cover the theories I learned in college and how I apply it in different kindergartens as a teacher. This article is already very long, so let’s cover all of this in the next article.